Knowledge Base
How To Use The On Screen Keyboard In Windows 7
Published: November 18, 2013
Updated: October 3, 2017
In this article we will be explaining how to bring up the On Screen Keyboard for the T10/T10C Tablet. We also will be showing how to pin the keyboard, along with making the keyboard come up when you touch a text input field in Windows 7.Updated: October 3, 2017
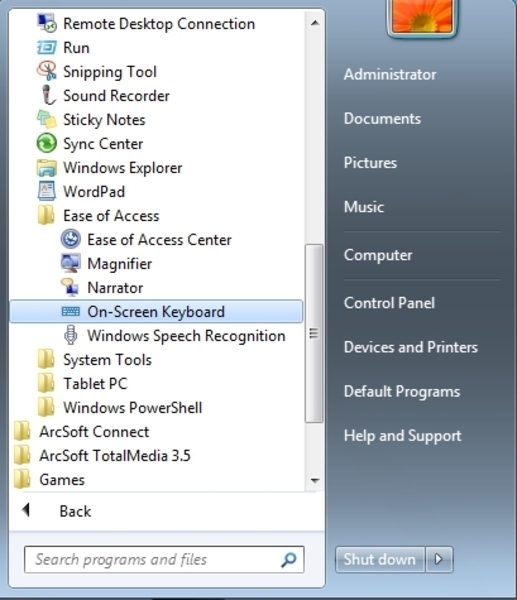
To bring up the On Screen Keyboard first hit the Start Button and then choose All Programs.
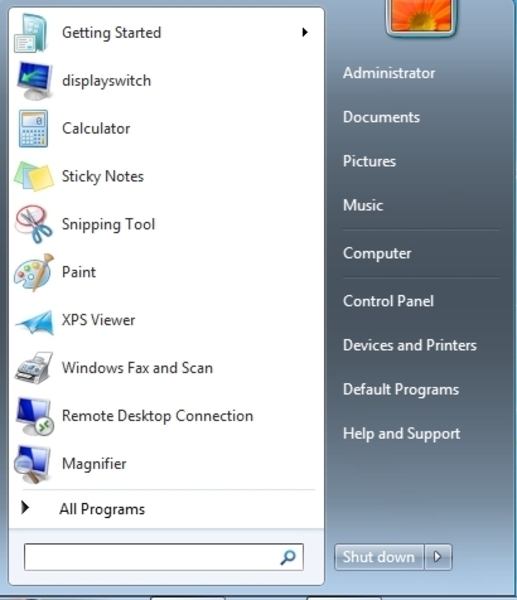
Next Choose Accessories.
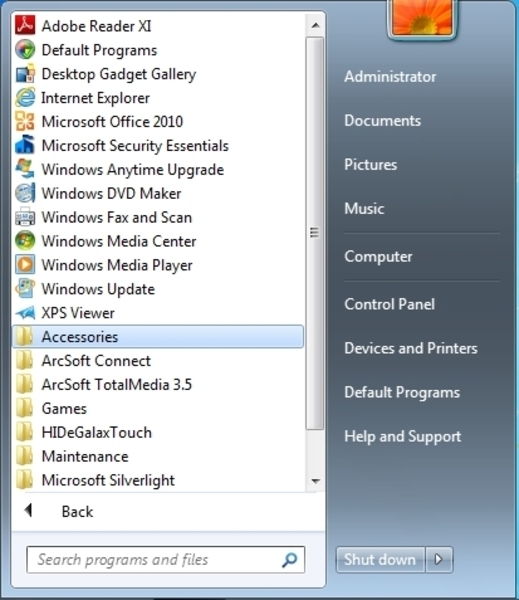
Now choose Ease of Access.
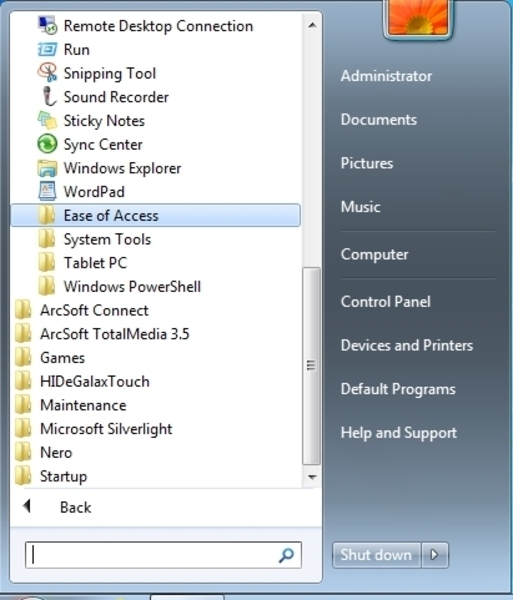
Finally select On Screen Keyboard.
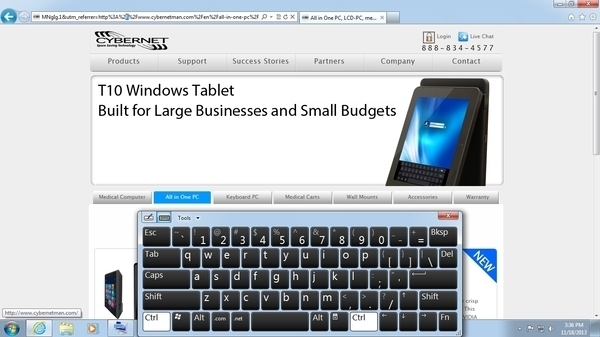
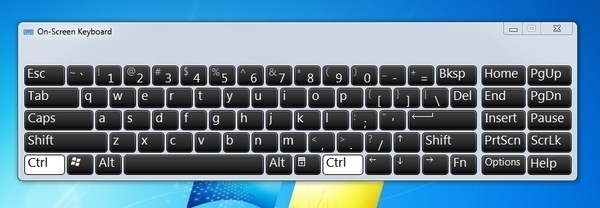
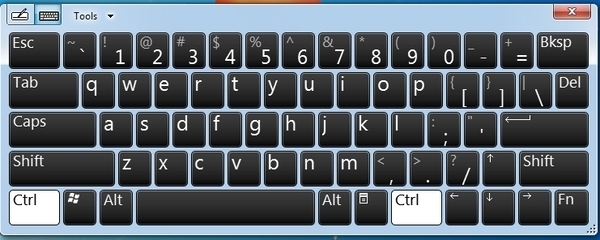
Here is what the On Screen Keyboard should look like
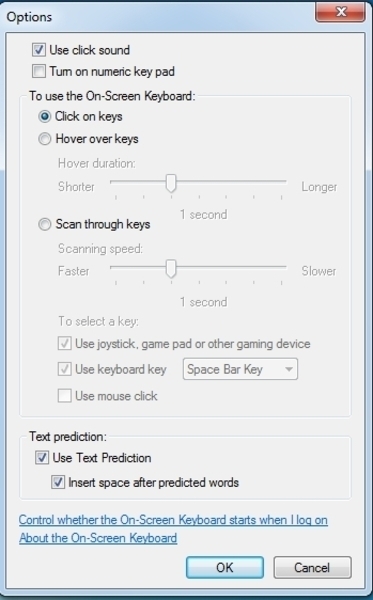
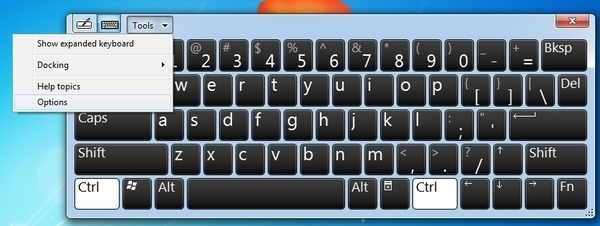
Now you can select the Options button on the keyboard.

Here you will see the options available for the On Screen Keyboard.
At the bottom you will see a choice for "Control whether the On-Screen Keyboard starts when I log on".
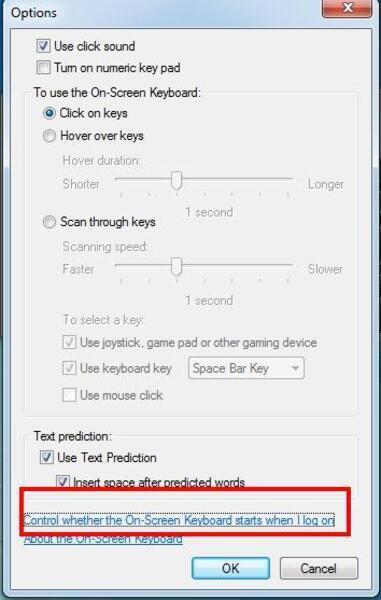
Now if you check mark the option "Use On-Screen Keyboard" and Apply the settings, you will now have the keyboard start every time you log on.
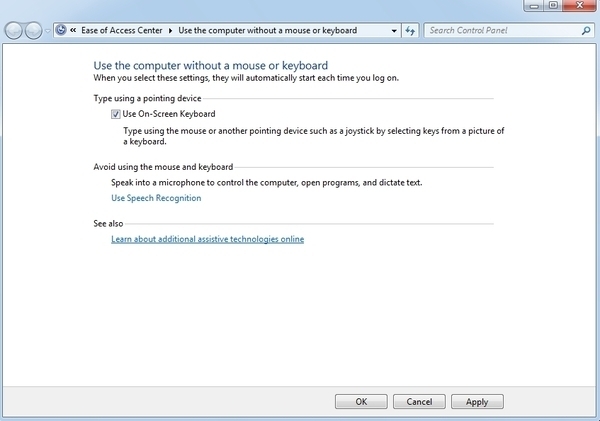
Now another popular feature in Windows 7 is having the On Screen Keyboard pinned to the left side along with it coming up when you touch a text input field. To enable this, first click the Start Button and type Tablet into the search field. Now select Tablet PC Input Panel.
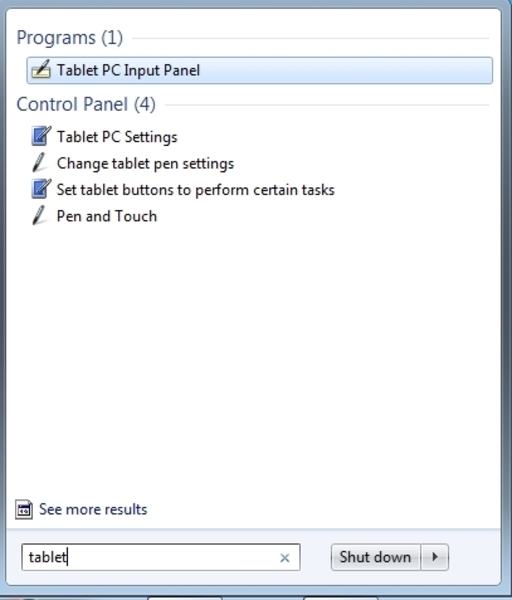
This is what will come up after selecting Tablet PC Input Panel.
To change options you will want to go to the Tools menu and select Options.
Here is what the options page will look like.
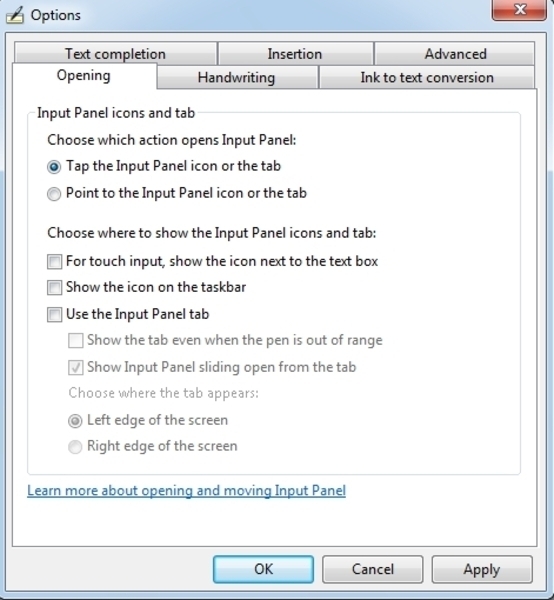
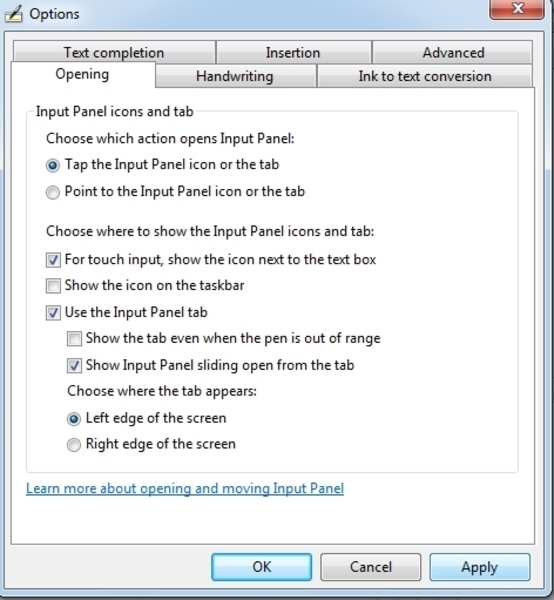
The most common settings are seen below. Check mark both "For touch input, show the icon next to the text box" and "Use the Input Panel tab". You can also if you want it pinned to the Left edge or Right edge. Then click Apply and Ok.
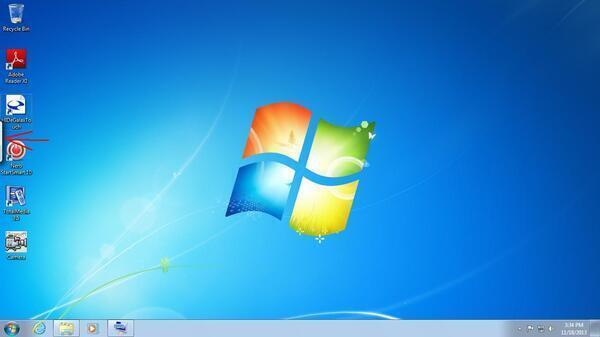
You will notice below that the On Screen Keyboard is now pinned on the left side. If you double tap the icon it will bring up the On Screen Keyboard.
If you go to a text input field such as a web browser and click the address bar you should now get an icon like the one below.
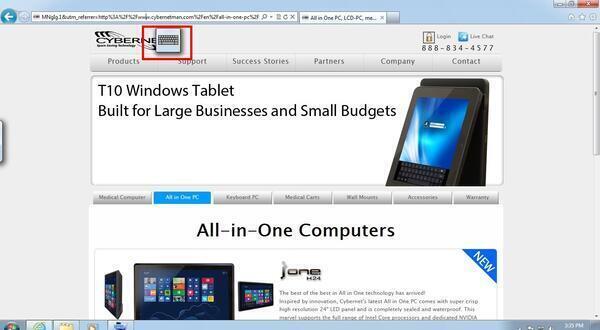
Once you tap the icon you will bring up the On Screen Keyboard.
